
抽屉效果实现三端化(android,ios,web)的历程
ReactNative运行
通过Native Code的运行命令是:
1 | react-native run-android |
具体过程:
- 启动js server: 用于生成本地打包服务Metro,地址:http://localhost:8081
- 编译打包,并安装:cd android && ./gradlew installDebug
- 手机通过http://localhost:8081访问js server:adb reverse tcp:8081 tcp:8081
- 启动App:adb shell am start -n 包名/activity
- App运行时,默认请求bundle的地址为:http://ip:8081/xxx
问题:当电脑切换wifi后,模拟器无法连接js server?
原因:电脑的ip地址变了,但App请求bundle地址没有变
彻底解决方案:在App里,进入Developer Menu,修改bundle请求地址为:http://localhost:8081
android模拟器快捷键
- Developer Menu: ⌘M
- Reload:two R
注意:使用x86的模拟器,此模拟器的运行速度与真机一致
react-native-web部署
通过ReactNative的Metro编译出的bundle.js文件,只能在对应的App里运行,无法直接在浏览器里运行。
在不考虑自定义View和Module的情况,要想生成的bundle.js可以直接在浏览器里运行,理论上只需要两步:
- 实现一套在浏览器里支持运行的react-native-web库
- 不通过Metro打包,通过webpack打包,把react-native-web库替换react-native库,同时打包在一起
react-native-web已经有实现版本了,详情请查看react-native-web
相应的webpack的配置过程,请参考:react-native-web-webpack
配置完后,不用对ReactNative代码做任何改动,就能直接在浏览器上支持运行,主要是使用了webpack的alias功能(整体替换react-native库):
1 | resolve: { |
三端实现:抽屉效果
调研
方案1:仿照DrawerLayoutAndroid的Api,实现DrawerLayoutIOS和DrawerLayoutWeb两套View
方案2:react-navigation库也实现了DrawerLayoutWeb,在webpack如下配置,就可以使用了:
1 | resolve: { |
注意:不是所有的react-navigation版本都能测试成功,1.0.0-beta.10测试通过,但beta.50测试失败
更详细的信息:Navigating in all platforms
方案3:使用基本组件(View,Animated,TouchableWithoutFeedback等),实现DrawerLayout,即可满足三端运行(react-native-drawer-layout)
此方案有一定的适配的问题,可能在android4.x系统里,运行会有一些问题
抽屉效果实现(方案3)
实现弹窗效果
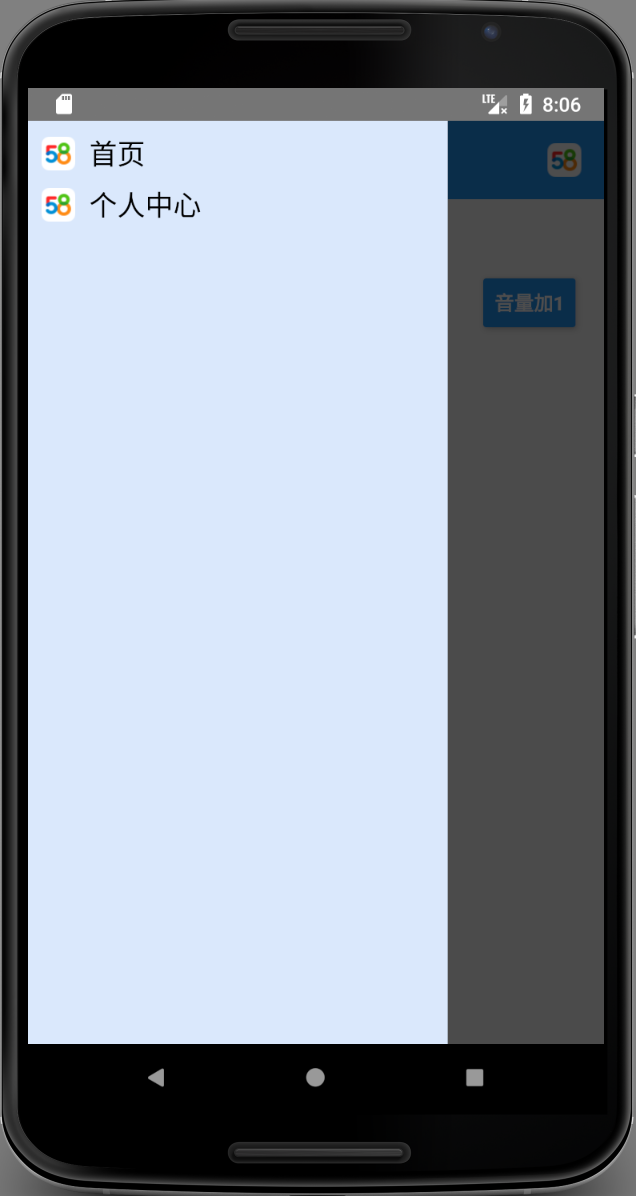
实现分析:
- 整体有三层View,最底层是首页,中间是遮罩层,最上层是抽屉
- 正常Flexbox布局相当于Android里的LinearLayout布局,但通过position=absolute,与zindex可实现叠加效果,更多请参考CSS position Property
1 | <View |
实现抽屉展开与收起动画
两个动画:
- 遮罩层渐隐和渐现动画
- 抽屉水平移动动画
2维动画实现的思路比较简单,以遮罩层的渐隐动画为例:
假设当前的透明度为变量x,例用Animated.View的opacity样式
1
2
3
4
5
6
7
8
9
10
11
12
13
14..........
<Animated.View
style={{
backgroundColor: '#000000',
position: 'absolute',
top: 0,
left: 0,
bottom: 0,
right: 0,
zIndex: 1000,
opacity: x // 设置透明度
}}>
</Animated.View>
..........定时修改变量x,并重新渲染,动画就行成了
真正的实现:
通过变量设置透明度与水平移动理
1
2
3
4
5
6
7
8
9
10
11
12
13
14
15
16
17
18
19
20
21
22
23
24
25
26
27
28
29
30
31
32
33
34
35
36
37
38
39
40
41
42
43
44
45
46
47
48
49render(){
const {drawerWidth, drawerBackgroundColor} = this.props;
const {openValue, drawerShown} = this.state;
const dynamicDrawerStyles = {
backgroundColor: drawerBackgroundColor,
width: drawerWidth,
left: 0,
};
let drawerTranslateX = openValue.interpolate({
inputRange: [0, 1],
outputRange: [-drawerWidth, 0],
});
const animatedDrawerStyles = {
transform: [{ translateX: drawerTranslateX}],
};
const overlayOpacity = openValue.interpolate({
inputRange: [0, 1],
outputRange: [0, 0.7],
});
const animatedOverlayStyles = {opacity: overlayOpacity};
const pointerEvents = drawerShown ? "auto" : "none";
return (
<View
style={{ flex: 1, backgroundColor: 'transparent'}}>
<Animated.View
style={styles.main}>
{this.props.children}
</Animated.View>
<TouchableWithoutFeedback
pointerEvents={pointerEvents}
onPress={this._onOverlayClick}>
<Animated.View
pointerEvents={pointerEvents}
style={[styles.overlay, animatedOverlayStyles]}>
</Animated.View>
</TouchableWithoutFeedback>
<Animated.View
style={[styles.drawer, dynamicDrawerStyles, animatedDrawerStyles]}>
{this.props.renderNavigationView()}
</Animated.View>
</View>
);
}定时修改变量
1
2
3
4
5
6Animated.spring(this.state.openValue, {
toValue: 1,
bounciness: 0,
// restSpeedThreshold: 0.1,
useNativeDriver: true
}).start();
重点知识点:
- css3也有一个transform属性,但这个是ReactNative的transform属性,有区别,其分别对应的文档:
- translateX属性的范围不是0–1,而实际抽屉的宽度
- 渐隐取值范围:[0–0.7],水平移动画的取值范围:[0–抽屉的宽广],变量openValue的取值范围:[0–1]。Animated.Value()的interpolate()方法进行转换,使其在同一个维度
特别注意:使用Animated.Value变量时,只能在Animated.View里使用,不能直接在View里使用,会出现各种想像不到的问题
遮罩层的事件处理
这个比较简单,通过TouchableWithoutFeedback就可以实现
注意:overlay设置为全透明后,还是一样可以拦截或透传事件,通过View的pointerEvents属性配制事件传递
触发抽屉显示动画
下面是真正的使用DrawerLayout的代码:
1 | render(){ |
真正触发抽屉显示动画的是HomeScreen(首页),并不是DrawerLayout自已,所以需要使用React的ref属性,把DrawLayout的引用传递给其他View,才能调用其对外提供的Api。
学习到的技术点(记住)
端口映射(USB连接)
在手机设备里通过http://localhost:port/访问pc上的服务时,使用如下命令:
1
2adb reverse (remote) (local)
例子:adb -s 设备 reverse tcp:8081 tcp:8081在pc上通过http://localhost:port/,访问手机设备上的服务时,使用如下命令:
1
2adb forward (local) (remote)
例子:adb forward tcp:8081 tcp:8081
函数里的this的理解
- this的指向在函数定义的时候是确定不了的,只有函数执行的时候才能确定this到底指向谁,实际上this的最终指向的是那个调用它的对象。更多信息
- 通过.bind()可以修改this的指向
- 箭头函数的this,是由定义时的上下文决定,而不是由运行时决定。
在ES6里,定义类时,其函数的写法有下面两种:
1 | class Person { |
getName()方法,在下面的场景下会执行有问题:
1 | const person = new Person(xxx); |
要解决这个问题,需要在构造函数里添加:this.getName = this.getName.bind(this)
getName()与getAge()方法的其他不同点:
getName()定义在原型上,getAge()定义在对象上,当类的对象很多时,比较占内存
1
2
3
4
5
6
7
8
9
10
11
12
13
14
15// getAge()方法相当于在构造函数里创建
constructor(props){
super(props);
this.name = "Li";
this.age = "18";
this.getAge = ()=>{
console.log("Person.age=" + this.age);
}
}
// getName()相当于在原型上定义
Person.prototype.getName = function(){
console.log("Person.age=" + this.age);
}箭头函数的继承的三种情况:
1
2
3
4
5
6
7
8
9
10
11
12
13
14
15
16
17
18
19
20
21
22
23
24
25
26
27
28
29
30
31
32
33
34
35
36
37
38
39
40
41
42
43
44
45
46
47
48// 继承1
class Student extends Person{
getAge = ()=>{
super.getAge();
console.log("Student.age");
}
}
new Student().getAge();
// Uncaught TypeError: (intermediate value).getAge is not a function
// 继承2
class Student extends Person{
getAge(){
super.getAge();
console.log("Student.age");
}
}
new Student().getAge();
// Person.age=18
// 继承3
class Student extends Person{
}
new Student().getAge();
// Person.age=18
// 继承4
class Student extends Person{
getName(){
super.getName();
console.log("Student.name");
}
}
new Student().getName();
// Person.name=Li
// Student.name
// 继承5
class Student extends Person{
getName=()=>{
super.getName();
console.log("Student.name");
}
}
new Student().getName();
// Person.name=Li
// Student.name结论就是:箭头函数可以继承,但无法被重写
flexbox布局理解
- Flex布局类似于Android里的LinearLayout布局,flexDirection,justifyContent,alignItems,alignSelf
- width,height的值尖似于dip,会依据手机的屏幕进行转换,PixelRatio更多信息
- Flex的布局,默认是一层布局,通过position=absolute,与zindex可实现Android里的RelativeLayout效果。CSS position Property
webpack的resolve.alias
可以给import或require设置别名,利用此特性,可以把引入库修改掉,但同时又不用修改源码,更多信息
React的组件之间的交互方式
默认情况下,props是父组件与子组件交互的唯一方式,父组件要修改子组件,通过新的props去重新渲染子组件。这种方案可以起到很好的解耦,但在少数情况下,无法满足需求,如抽屉的展开与收起动画。
这种情况下,可以使用Refs,比较适合使用refs的场景:
- 处理focus、文本选择或者媒体播放
- 触发强制动画
- 集成第三方DOM库